Inside the Tool: How Wrenches Are Made
- Gray Tools Official Blog
- 30 Mar, 2023
by Eric Garbe, Senior Automotive Technical Writer, TechShop Magazine
I’ve always enjoyed watching a blacksmith work. It’s an art form, and a fascinating process to watch them pull red-hot metal from the forge, then a few minutes later with some skillful hammering and shaping, see an everyday object take shape. There’s just something intriguing about it, from the smell of the fire to the red-hot metal to the rhythmic clanking of the hammer.
In the old days, a blacksmith was known for making tools, horseshoes, wagon parts, farm implements and anything out of metal. But by the time the automobile arrived and created the need for auto mechanics and specific automotive tools, the industrial revolution had already changed the world with the development of machines and processes to minimize manual labor and increase the output of products. And that’s not the only thing that changed.
Today’s tools are built to withstand levels of stress well above that of years ago, and as auto technicians, we rely on it. A far cry from the hammer and anvil, today’s world of manufacturing is a fascinating subject, twisting together the evolution of science and technology into a dynamic process.
Wrenches are one of our most used tools, and they can take some serious abuse, so I thought it a perfect time to take a first-hand look at how they are made. Here’s a rundown.
Individual companies have their own specific formulas and procedures, but the major steps of the process are generally the same. It all starts with the material.
Most wrenches are made from an alloy steel, and more specifically, 6140 Chrome Vanadium steel. The reason is that 6140 Chrome Vanadium is a proven material for products that require both strength and durability. While those two aspects initially might seem to be one in the same, they are two different things.
Strength is a characteristic that means a material can withstand a considerable force, and durability is a characteristic that means it can withstand that force over and over again.
“When you select an alloy to make a tool out of, you need to think of the end use. The type of material you are going to make a hammer out of is different than that you are going to make a wrench out of,” said Paul Dean, VP of Operations, Gray Tools. “You pick a material that is going to impart the properties that the end use tool requires. When you think of a wrench, it must be strong so it doesn’t distort, and it must be durable, so it doesn’t wear. Chrome Vanadium is a common material, but we all use it because of the common properties in it.”

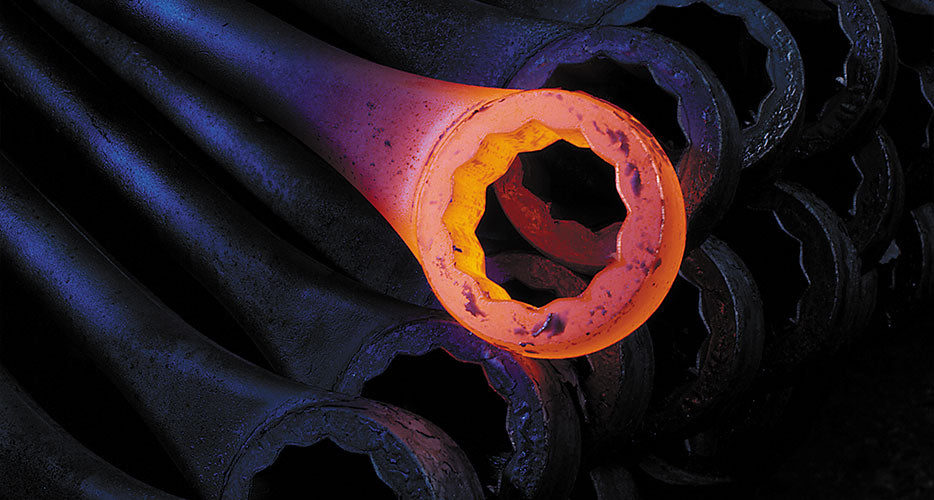
A stack of forged wrenches cooling off
Dean also pointed out that 6140 Chrome Vanadium has good abrasion, oxidation and corrosion resistance, and it’s conducive to future hardening, so it’s often used as a base material for products that will go through a hardening step during the manufacturing process.
Since wrench manufacturers receive materials in large quantity, for example long steel rods, as a pre-production process these rods are cut to specific sizes, then often sand-blasted to remove any impurities that could affect the production process. The billet, at that point just a piece of metal, is then heated close to its melting temperature.
Then it is drop forged, a process that takes the hot billet and shapes it into a rough forging. The rough forging gives you the shape you want, but not necessarily all the dimensions you need. When making wrenches, more than one size may be made from the same forging. The forging process is often only one step, but it sometimes requires more than one depending on the configuration of the wrench, and some manufacturers utilize a nitrogen atmosphere during parts of it to protect the purity of the steel from the surrounding oxygen, which could cause burns and slag.
The forgings cool quickly on their own but are then moved on to the next step of annealing. Annealing is a form of heat treatment which alters the physical properties of the metal to soften it in preparation for the finishing steps.
Next in line is broaching, a specific machining process which is the most common way of sizing the open and boxed ends of the wrenches. A broach is a metalworking tool that has a succession of teeth which increase in size in small increments, and pulled broaching is the most common process for wrenches, where the broach is pulled through until you get the size you want.
Now it’s time to stamp the wrench, which includes the sizing, part number and company name, and this is usually done on a punch press. After forging, a wrench is annealed so it is so enough to accept material removal and stamping, but after stamping, the metal needs no more work from a molecular standpoint of moving or shaping the metal.
Now it moves on to heat treating. All wrenches are heat treated to meet the hardness standards set forth by both American and international governing societies. Minimum and maximum hardness levels are very specific. A wrench cannot be too soft where it would potentially round off during use, and not too hard, causing it to be brittle. The heat-treating process, which is a critical and very scientific part of manufacturing, is often followed and combined with quenching and tempering.
An example is heat treating which heats the wrench and allows the absorption of carbon into the surface layer, followed by a cooling process called quenching, which dips it into a heated oil to precisely control the cooling time. Tempering is then an immediate follow-up heating and cooling process with different parameters. Heat treating strengthens the wrench, tempering prevents it from becoming too brittle.
Many consider heat treating the most complicated part of the manufacturing process. “Each material has a different recipe for heat treating,” said Dean. “You tell your heat treater what the material is and the desired hardness, and they will come up with a curve. The real issue is, you can’t cool it too quickly because the metal could have delamination or micro cracks. It’s generally done in hotter oil to slow down the cooling.”
The heat-treating process can take hours, and it’s a very specific formula that can be difficult to get it right on, so there’s always an acceptable variance. After the wrenches are heat treated, they are checked with a hardness tester to make sure they are within the required tolerance.
As wrenches go through the manufacturing process, there’s quality control at every step, ensuring both highest performance and efficient production. “At Beta, the quality and design of our tools combines skill, craftsmanship and state-of-the-art technology,” said Destiny Skipper, Marketing Manager, Beta Tools USA.
After the hardness test and quality checks, it’s time for the polishing step. Polishing can be performed by a machine or done by hand, and it’s the first step affecting the final appearance of the wrench. Some companies also utilize a roto-finishing step. Roto-finishing, also known as vibratory finishing or tumbling, utilizes some form of media, commonly ceramic. The wrenches go in a container with water and chemicals, and they are then tumbled, which takes off any burrs, dirt or scale from heat treating, and you end up with an unplated product that looks very nice, smooth and shiny.
Now the wrench is ready for plating. The most common plating for wrenches is chrome (usually a nickel chrome), or a black oxide finish. Chrome plating is an electro plating that applies a current through the wrench, then deposits a nickel flash on the product first, and on top of the nickel flash, a layer of chrome.

A beautiful sight: chrome-plated wrenches
Black Oxide, on the other hand, is a chemical process where you put iron oxide into the surface of the product. Chrome is a more expensive process, and there’s a price difference for wrenches based on this factor alone.
Is one better than the other? The finish you choose depends on what you are using the wrench for and the environment. Chrome is very easy to maintain, corrosion-resistant and the nickel adds a little bit of hardness to the outside. It is most frequently used in the food industry because of the necessity to keep tools clean, the automotive industry and aircraft manufacturing. If there’s a downside to chrome, it’s only the complaint that it’s slippery when greasy, but unless the finish is damaged, you’ll never have to worry about corrosion.
Black oxide is harder to maintain and not as corrosion resistant, but it offers superior chip resistance. It also keeps a much sharper edge because it is much thinner than chrome, whereas chrome can round off at the edges. For this reason, black oxide is also used for impact tools. Black oxide tools should be oiled to prevent corrosion, so they’re a little higher maintenance, but some prefer black oxide because they’re easier to grip when greasy and not reflective, which is an advantage when working outdoors.
Like a paint job on a car, the wrench must be cleaned and prepped properly for any finish, because even the slightest imperfection will be visible. Chrome is especially susceptible to showing imperfections and a chrome plater must also know their chemistry and voltages, or the chrome may be discolored.
By design, some wrenches have a satin chrome finish versus bright chrome. The chrome is essentially the same and is just as protective, but the difference comes from the surface finish of the wrench prior to plating. Some prefer the satin finish as it, too, is easier to grip when greasy, and it is not reflective like bright chrome, which can prevent unwanted glare, especially when working outdoors.
So that’s the gist of it. How cool is the making of a wrench? Let’s see, we’ve got raw steel, red hot metal, forging, stamping, heat treating, science, technology, flames and chrome. Yup, it’s cool.
This article is reposted with permission of TechShop and Babcox Media (https://www.techshopmag.com/).


Great article. Nice to learn about the complex engineering that is behind what we see as a simple hand tool. Also thanks for explaining the alloy used in producing these tools I have often wondered about that.
Keep up the good work, I proud of my Gray tools.
Peter
Excellent article ! Thanks, jb