A Guide to Pry Bars
- Gray Tools Official Blog
- 29 Apr, 2020
Do you find yourself needing to pry things apart? How about levering, lifting, and pulling nails? If the answer is yes, then you are in need of a pry bar.
One of the first tools developed by humankind, the pry bar has been established as a versatile and necessary tool. Over time, many variations of the pry bar have been developed; now there is a plethora of styles and options on the market.
How does one select the right pry bar for the task at hand? Let’s begin by defining what a pry bar is.
What is a Pry Bar?
A pry bar is a tool typically made from forged alloy steel that may have a flattened end, a claw, or pointed end.
The tool is quite versatile because the flattened end allows it to be used as a lever, the claw makes leverage easier, the pointed end is ideal for ‘mating holes’, and an end featuring a small crevice is used for removing nails.
Pry bars may be heat-treated and/or tempered before being coated to resist rusting.
It is important to note that the length of the pry bar is important. The golden rule is the heavier the object to be lifted, the longer the bar needs to be.
The pry bar has also been referred to by many different names, so don’t be confused if someone calls the tool a ‘jimmy’, crowbar, wrecking bar, gooseneck, ‘cat’s paw’, pinch bar – or as Shakespeare referred to it, an iron crow.
Manufacturing Process
Pry bars are commonly made from carbon or alloy steel, depending on the style and manufacturer.
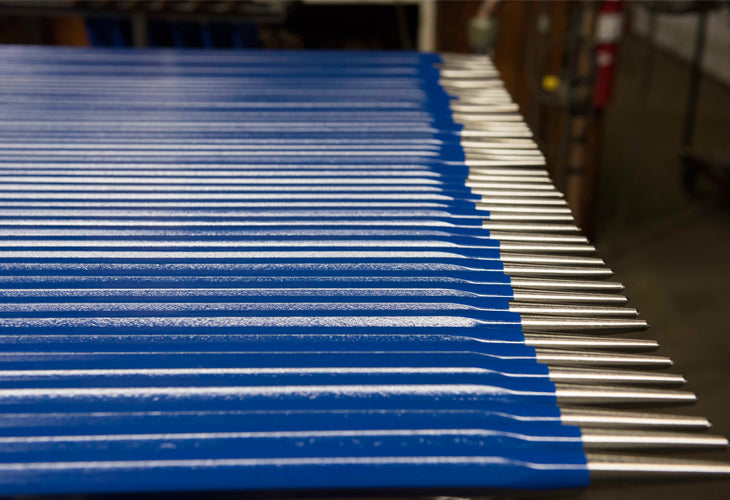
There are a variety of manufacturing methods used to produce a pry bar, including: swagging, hot stamping and machining. They then go through finishing steps, which may include stamping, polishing, heat treatment, shot blast, hand sharpening, and plating or painting. Pry bars that are heat treated are very strong and flexible to avoid breaking while in use.
While shopping around for your next pry bar, consider looking for a tool that is produced using the heat treatment process. The finish is also important to consider as it acts as a protective layer and increases the durability of the tool.
Some manufacturers pride themselves on hand polishing and sharpening the pry bars for a high quality finish; this is a positive that you may want to keep an eye out for. The finish commonly involves either a nickel strike finish or enamel tool paint and lacquer finish – both can be very durable and add to the high quality tool.
Parts of a Pry Bar
There are many variations in design, below are the various features of a pry bar and some tips on the benefits of different styles.

Shaft: comes in a variety of shapes and designs, each with its own benefits. A rounded shaft makes is easy to hold while a flat shaft is better for tighter spaces. Contour shaft curves back to increase leverage; hexagonal shaft has six sides for better grip and is great for levering. Finally, an I-beam shaft is lighter but very strong
Claw: just like the shaft, the claw design can vary depending on the type of pry bar and its functionality. A straight claw is a common feature for most bars, it is forged in line with the shaft. Bent claw increases leverage and decreases damage to the work piece. Beveled claw makes it easier to get beneath and between items. Flat claw increases leverage as it can be inserted deeper in tight spaces. Wide claw offers a larger surface area for prying.
Nail slot is a feature that makes removing a nail easier. An adjustable claw is very versatile as the angle of the claw can be adjusted and locked in place.
Tip: a pry bar may feature a second claw or it could have a pointed tip. The pointed tip is ideal for locating and aligning ‘mating holes’.
Heel: can be flat or rounded. A flat heal can be used as a striking surface; a rounded heal increases leverage as it helps the claw rock back and forth
Handle: a pry bar may feature a handle on one end for a more comfortable grip.
Popular Types of Pry Bars
Next are the more popular types of pry bars. Keep in mind your needs and uses for the pry bar when selecting the right one for you.

Rolling Head Pry Bar: features the standard round shaft, pointed tip, and bent claw. Applications include simple prying, lifting and leveraging, locating and aligning applications.

Wonder Bar (Nail Puller): features a flat shaft, a right angle claw and one offset claw. The wonder bar is used when precision and control is needed for nail pulling, lifting, scraping, prying and levering. Ideal for a variety of house maintenance, construction, and demolition tasks.

Pinch Bar: features a round or hexagonal shaft, one chisel end and a pointed tip end. This is the longest and second heaviest pry bar manufactured. The pinch bar can be used to align mating holes, such as boltholes, by prying the holes into alignment. Secondary purpose would be levering and lifting objects.

Wrecking Bar: features a hexagonal shank, flat end claw and may also incorporate a goose neck claw. This pry bar design is used in heavy-duty prying applications and demolition work.
Railroad Track Pry Bar: features hexagonal shaft, a 45-degree claw end, and a pointed tip. As the name suggests, this pry bar ideal for railway track maintenance.
Adjustable Pry Bar: features an adjustable claw and may include an extendable shaft. A pry bar with an extendable shaft is the heaviest pry bar you can buy. Applications include more complex prying (i.e. in difficult, confined spaces or more tightly fastened objects), and levering and lifting larger items such as doors and floorboards.
Selecting a Pry Bar-Three Things to Consider
When selecting a pry bar, keep in mind the following points.
- Budget. While the adjustable pry bar is great in tight spaces, the bar tends to be the more expensive and heavier option. Its pivoting joint can also be a weak point when used to leverage heavy objects. A fixed pry bar is a cheaper option and the lighter weight makes it easier to carry with you.
- Quality. Some manufacturers will sacrifice quality to offer the tool at a cheaper price. Be wary of a price that seems too good to be true – the last thing you want happening is the bar bending or snapping right when you need it. Gray Tools Canada prides itself on manufacturing high quality Canadian pry bars. The bars are made from the best quality alloy steel, they are heating treated to increase toughness, nickel plated to increase durability and protect against corrosion, and have the benefit of being hand polished.
- Your Needs. There are many pry bar options on the market for you to consider, first narrow down the features that meet your needs. Needs first, price second.
How to Properly Operate a Pry Bar
Before using a pry bar, it is first important to understand the proper way to use the tool to ensure your own physical safety.
To begin, check your tool and ensure the tool is not damaged or bent, using a damaged tool could increase the risk of breaking the tool and hurting yourself.
Next, be aware of your environment and check for factors that may create risk for you or others, for example physical hazards that could cause you to slip.
The grip on the pry bar is important, therefore wearing gloves that are dry and have grip material on the palms would be useful.
Further safety practices include wearing eye protection and a hard hat, especially important while prying items apart or pulling nails in case an item breaks off and flies towards you.
Never place an object under the shaft of the pry bar to in order generate additional leverage. Doing this manner creates a pressure fulcrum that places stress on the shaft of the pry bar resulting in a very unsafe user environment.
Finally, your posture while using the tool is critical for your physical well-being, especially if you are lifting heavier objects. Ensure your position is balanced: stand facing the bar with your legs shoulder-width apart and slightly bent, do not position your body directly over the bar, and grip the pry bar tightly with both hands.
If you have to bend to use the pry bar, for example while levering a heavy object, ensure that you bend at the knees while keeping your back straight to avoid injuring your back and hamstrings. If the item is too heavy or too large, make sure you ask for help before using the pry bar alone.
Pry Bar Maintenance and Care
Maintenance and care is important to remember to increase the longevity of the tool. Here are some tips to get the most out of your pry bar.
- File the claws regularly to keep them sharp and ready for use, but make sure you don’t remove too much of the protective finish.
- Using non-corrosive oil on the bar will protect the bar from the elements. Good to use the oil after filing or when you notice the bar has become dirty.
- Do not strain the shaft of the bar by applying excessive force. Remember the golden rule, the heavier the object to be lifted, the longer the bar needs to be.
- Dry the bars after getting it wet and store it in a dry space to ward against corrosion.
Remember, a good quality pry bar will bend slowly when it is stressed beyond its design capacity. A poor quality bar will snap unexpectedly creating a potentially dangerous situation.


Compliments on a great article.
very informative, I did not realize all the different types of prybars made or the correct names. Thanks G